Arduino Temperature Driven Fan

Schema of Arduino controlled two speeds fan with LCD

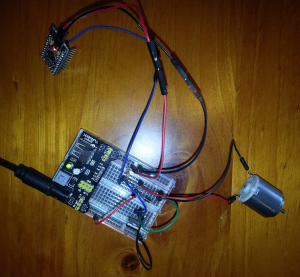
This project is about driving a two speed fan with an Arduino, based on the environment’s temperature.

The project has been designed to help automating an existing fire-based heating system. The idea is that the environment will be warmed faster, by driving heated air into the room with a multi speed fan, while the fire is hot and the surrounding environment not yet.

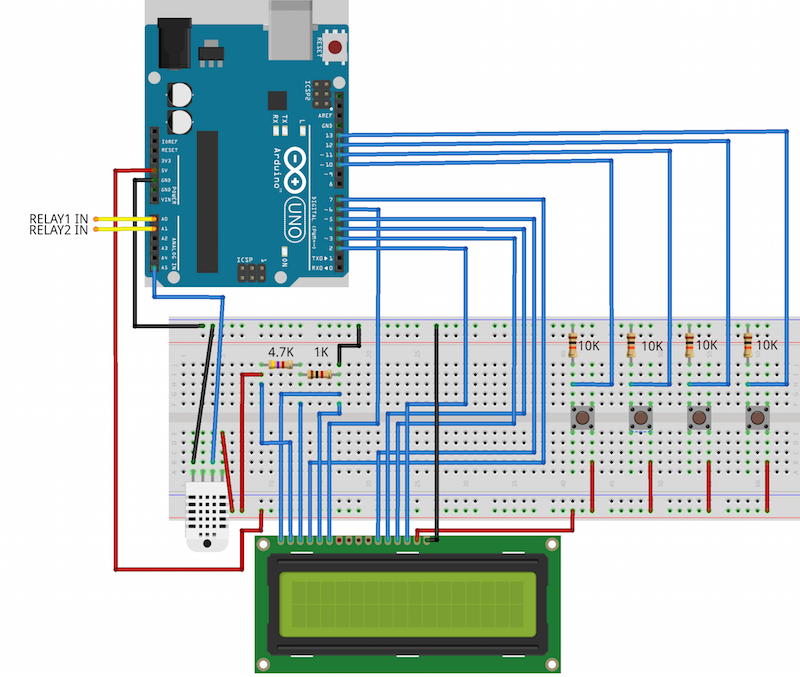
I wanted to make it a little more interesting by adding a LCD display to show temperature, humidity and fan status, and four buttons to increase and decrease the two temperature values that drive the fan speeds.

Arduino Prototype of Temperature Driven Fan

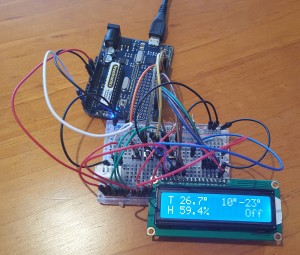
When the temperature is below the lowest temperature threshold, the fan will be running at full speed. With temperatures between the lowest and the highest threshold the fan will be running at half speed and with temperatures above the highest threshold the fan will be off.

This project demonstrates the use of an Arduino (or compatible) micro controller with a temperature and humidity sensor to drive outputs, it demonstrates the usage of a LCD display, push buttons and EEPROM memory storage.

Read more

How to drive a small motor at different speeds using an Arduino

Control motor speed with Arduino
Control DC motor’s speed using Arduino

For one of my projects I needed to drive a small motor at different speeds, so I gave this a go by reading and learning more about what is required.

We can achieve that with an Arduino microcontroller by using PWM signals. For this project I am using an Arduino Mini clone, and decided to drive the motor with a N-Channel MOSFET (voltage controlled transistors), activated by a PWM signal.

PWM Duty Cycle
PWM Duty Cycle – Source Wikipedia

Keeping the frequency of the signal constant, and varying the width of the “on” time vs the width of the “off” time (changing the duty cycle), will make the motor spin at different speeds.

The signal values that Arduino expects for the duty cycle is from 0 to 255 and it can be set by using the function analogWrite(pin, value). By providing a different duty cycle value to our Arduino pin (in my case PWM pin number 5), the motor will spin at different speed.

Read more